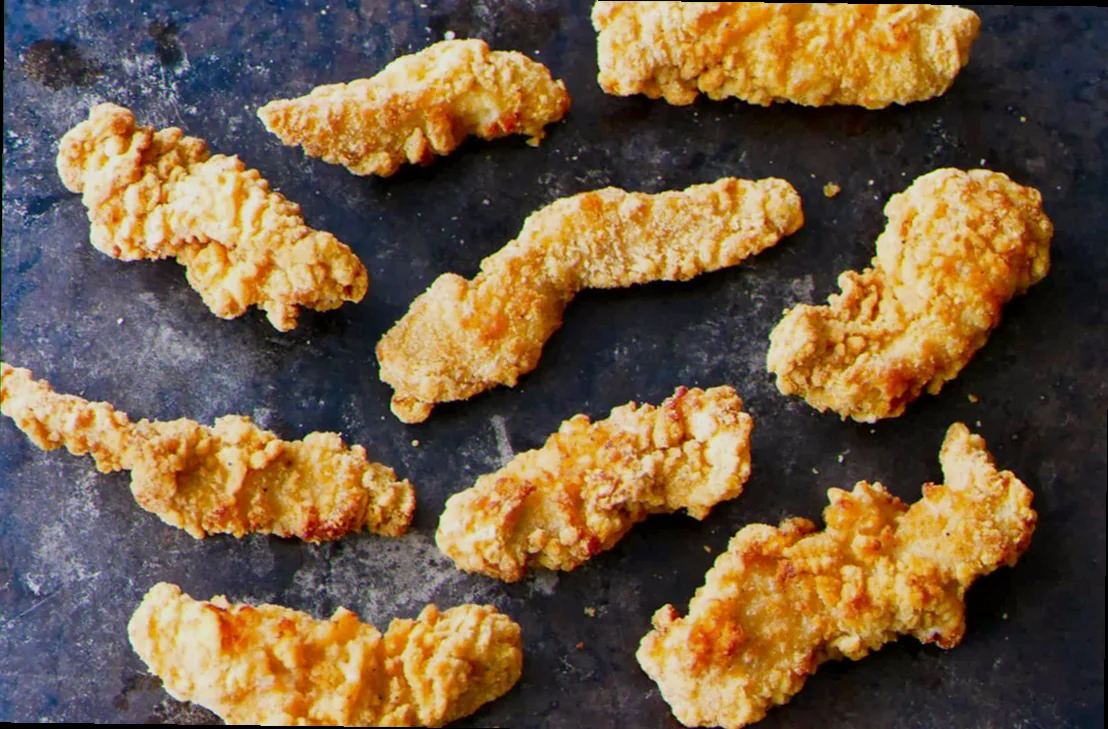
The satisfying sizzle and golden-brown crust of a perfectly fried chicken strip - a testament to Maillard reaction and controlled lipid oxidation. This dish, Chicken Strips, originates from American Southern cuisine, evolving from humble fried chicken preparations in the early 20th century, popularized through fast-food chains and now enjoyed globally. The defining technique is deep frying, relying on precise temperature control to achieve both crispness and juicy interior - a delicate balance demanding attention to detail. The hero ingredients are chicken breast, all-purpose flour, and cornstarch, with a critical ratio of 2:1 flour to cornstarch dictating the final texture, providing a light, airy coating that contrasts beautifully with the rich, savory chicken.
Complete Recipe Overview
| Property | Detail |
|---|---|
| Dish entity | Chicken Strips |
| Cuisine origin | American Southern |
| Defining technique | Deep Frying |
| Hero ingredients | Chicken Breast, All-Purpose Flour, Cornstarch |
| Critical ratio | 2:1 Flour to Cornstarch |
| Prep time | 20 minutes |
| Cook time | 3-5 minutes at 175°C |
| Rest / chill time | 10 minutes |
| Yield | Approximately 48 strips (6 pieces per chicken breast) |
| Difficulty | Medium - requires careful temperature monitoring and attention to detail. |
Ingredients: Quantities, Roles, and Critical Ratios
The success of chicken strips hinges on a carefully orchestrated blend of ingredients. Chicken breast, typically boneless and skinless, provides the protein base. All-purpose flour acts as a binder, holding the coating together and contributing to the initial crispness. Cornstarch, in a 2:1 ratio to flour, is the key to achieving a light, airy, and exceptionally crispy coating - it inhibits gluten development, preventing a tough, chewy texture. A small amount of baking powder (0.5g) introduces microscopic air bubbles during frying, further enhancing the lightness. Salt and pepper season the chicken, while paprika adds color and a subtle smoky flavor. Finally, a buttermilk marinade tenderizes the chicken and contributes to a tangy flavor profile.
- Chicken Breast - 1.2 kg (approximately 4 chicken breasts) - Role: Protein base, provides the primary flavor.
- All-Purpose Flour - 240g - Role: Binder, contributes to initial crispness.
- Cornstarch - 120g - Role: Creates a light, airy, and exceptionally crispy coating; inhibits gluten development.
- Baking Powder - 0.5g - Role: Introduces air bubbles for a lighter texture.
- Salt - 6g - Role: Seasoning, enhances flavor.
- Black Pepper - 2g - Role: Seasoning, enhances flavor.
- Paprika - 2g - Role: Color and subtle smoky flavor.
- Buttermilk - 360 ml - Role: Tenderizes chicken, adds tangy flavor.
- Vegetable Oil - 750 ml - Role: Medium-heat frying medium.
The Science of Cornstarch and Flour
Cornstarch and flour's interaction during deep frying is a fascinating example of starch gelatinization and Maillard reaction. Cornstarch, being a pure starch, rapidly absorbs water and gelatinizes when heated. This gelatinization creates a network of hydrated starch granules, which expand and contribute to the airy texture of the coating. Flour, containing gluten proteins, forms a more rigid network. The 2:1 ratio of cornstarch to flour is crucial; too much flour would result in a dense, heavy coating, while too little would lack the desired lightness. Simultaneously, the Maillard reaction - a complex chemical reaction between amino acids and reducing sugars - occurs on the surface of the chicken and the coating, generating hundreds of flavor compounds responsible for the characteristic browned color and savory aroma. The high heat of deep frying accelerates this reaction, creating the signature crispy exterior.
Method: Deep Frying at Every Critical Stage
The goal of this method is to achieve a uniformly golden-brown, crispy exterior while maintaining a juicy, tender interior.
- Marinate Chicken - 30 minutes: Submerge chicken breasts in buttermilk, ensuring they are fully coated. This step is non-negotiable for tenderness and flavor. Sensory cue: Chicken should be visibly coated and slightly glistening.
- Prepare Coating - 10 minutes: In a shallow dish, whisk together flour, cornstarch, baking powder, salt, pepper, and paprika. Sensory cue: Coating should be evenly distributed and free of lumps.
- Dredge Chicken - 5 minutes: Working one piece at a time, dredge each buttermilk-soaked chicken breast thoroughly in the flour mixture, ensuring complete coverage. Sensory cue: Coating should adhere firmly to the chicken.
- Heat Oil - 10 minutes: Pour vegetable oil into a deep fryer or large pot. Heat to 175°C. Sensory cue: Oil should shimmer and a small drop of flour should sizzle immediately.
- Fry Chicken - 3-5 minutes: Carefully lower chicken strips into the hot oil, ensuring not to overcrowd the fryer. Fry for 3-5 minutes, flipping halfway through, until golden brown and cooked through (internal temperature of 74°C). Sensory cue: Chicken should be golden brown and crispy, with an internal temperature of 74°C.
- Rest - 10 minutes: Remove chicken strips from the oil and place them on a wire rack to drain excess oil. This allows the coating to set and maintain its crispness. Sensory cue: Chicken should be slightly firm to the touch.
- Plate and Serve - Immediately: Arrange chicken strips on a platter and serve immediately.
Cultural and Historical Context of American Southern Chicken Strips
The origins of chicken strips can be traced back to the early 20th century in the American South, where fried chicken was a staple. Initially, chicken was often fried whole, but the development of efficient cutting techniques - primarily by companies like Kentucky Fried Chicken in the 1950s - led to the creation of individual pieces, including strips. These strips were initially marketed as a more affordable and convenient alternative to whole fried chicken. Fast-food chains like McDonald's and Burger King further popularized the dish in the 1970s and 80s, cementing its place in American culinary culture. Today, chicken strips are enjoyed globally, with regional variations reflecting local tastes and preferences - from the classic Southern style to lighter, breaded versions found in contemporary restaurants.
Variations Across Culinary Entities
- Korean Fried Chicken - A variation characterized by double-frying in sweet chili sauce, resulting in an intensely crispy and glazed exterior. Flavor attribute: Sweet, spicy, and savory.
- Japanese Karaage - Chicken marinated in soy sauce, ginger, and garlic, then coated in potato starch and deep-fried. Flavor attribute: Umami-rich and subtly savory.
- Vegan/Gluten-Free Adaptation - Replacing the flour and buttermilk with gluten-free flour blend and plant-based milk (e.g., almond or soy milk). Impact on texture: Slightly softer coating, but still crispy with proper technique.
- Modern Adaptation - Utilizing panko breadcrumbs for an extra-crispy coating and incorporating seasonings like garlic powder and onion powder. Sacrifices: A slight reduction in the traditional buttermilk tang.
Storage, Freezing, and Reheating Chicken Strips
Proper storage is crucial to maintaining the crispness of chicken strips. Room temperature: Store leftover chicken strips in an airtight container for up to 2 days. Reheating: Bake at 175°C for 10-15 minutes, or air fry at 180°C for 8-10 minutes, until heated through. Texture change: Slight softening of the coating is expected. Refrigerator storage: Chicken strips can be stored in the refrigerator for up to 4 days in an airtight container. Freezer storage: Freeze chicken strips in a single layer on a baking sheet for 30 minutes to solidify, then transfer to a freezer-safe bag or container. They can be stored for up to 2-3 months. Reheating from frozen: Bake at 175°C for 20-25 minutes, or air fry at 180°C for 12-15 minutes, until heated through. Texture change: Significant softening of the coating is expected; best reheated immediately after thawing.
Pairing Chicken Strips: Sides, Sauces, and Drinks
Chicken strips pair exceptionally well with classic Southern sides like mashed potatoes and gravy, coleslaw, and mac and cheese. A creamy ranch dressing or a tangy honey mustard sauce complements the savory flavor of the chicken. For a beverage pairing, a crisp, dry lager or a light-bodied wheat beer provides a refreshing contrast to the richness of the dish, while the carbonation cuts through the fat. Alternatively, a sparkling apple cider offers a sweet and tangy counterpoint.
Answers to the Most-Searched Questions About How long does it take to deep fry chicken strips
What temperature should chicken strips be cooked at - and how do I know it's done?
Chicken strips should be cooked at 175°C until golden brown and cooked through, with an internal temperature of 74°C. Use a meat thermometer to ensure accuracy.
What is the difference between How long does it take to deep fry chicken strips and fried chicken?
Fried chicken typically involves frying a whole chicken, while chicken strips are individual pieces. The cooking time is similar, but the smaller size of the strips allows for faster cooking and a more uniform texture.
Can chicken strips be made in advance, and does it freeze well?
Yes, chicken strips can be made in advance and frozen. Freeze them in a single layer on a baking sheet before transferring them to a freezer-safe bag or container for up to 2-3 months. Reheating from frozen will result in a softer coating, so it's best to reheat them immediately after thawing.